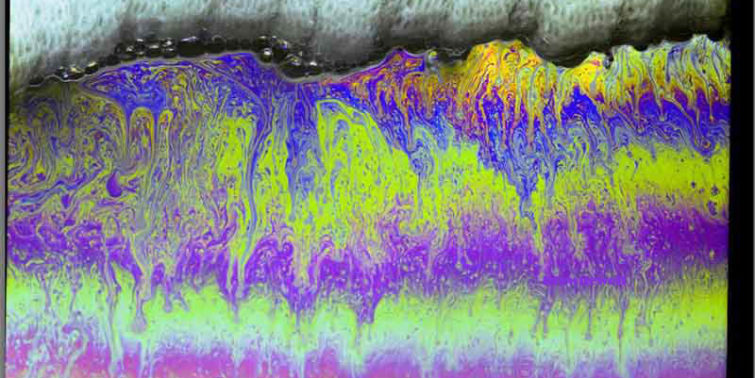
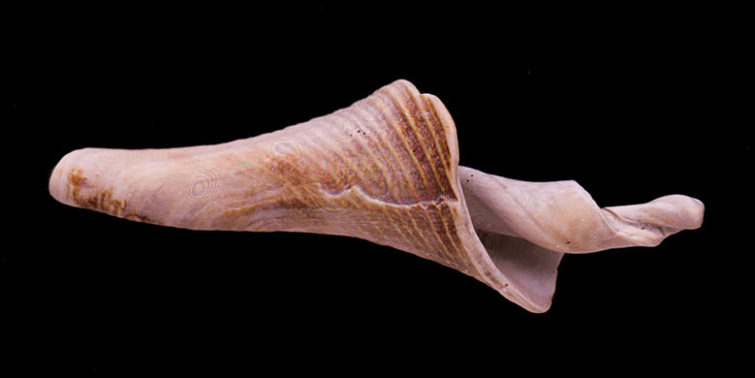
From Bombs to Bubbles

For more information about the Elkhart Area Career Center, please visit MyEacc.org 

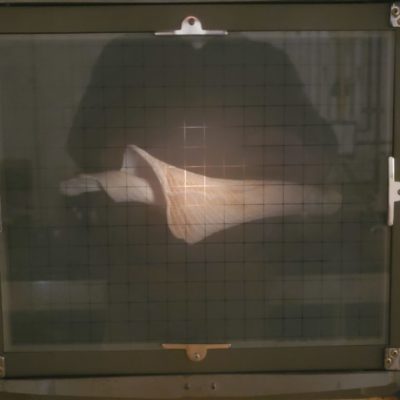
You didn’t ask to learn about bellows extension factors but we’re going to cover it with the most absurd camera that you may ever see! 

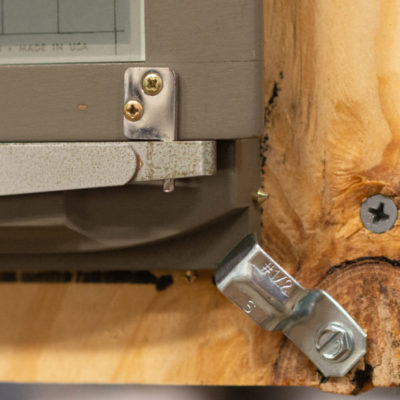
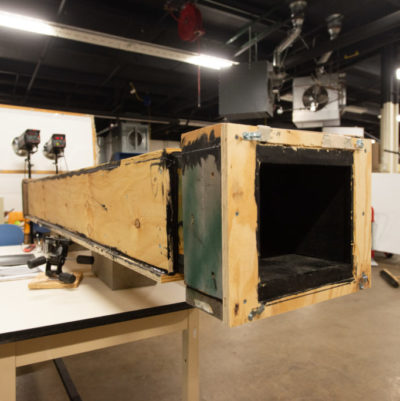
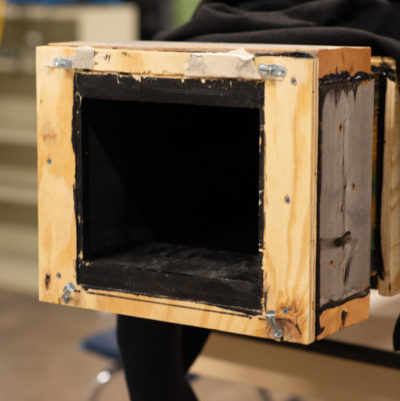
Built from over two sheets of plywood, scraps of 2x6s, old drywall screws, and the cheapest 610mm lens that I could find on eBay, literally every expense was spared. I would be surprised if I spent more than $200 out of pocket to create this 10′ behemoth.

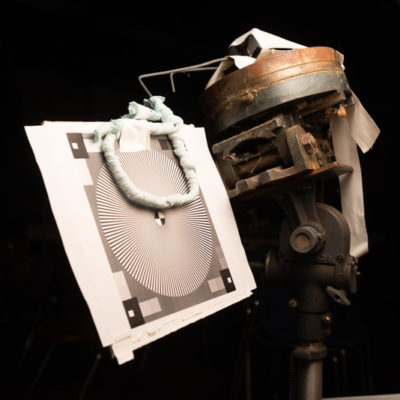
This lens is a reconnaissance lens from WWII. It was used to find targets to blow up, follow troop movements, photograph destruction, mapping and more. We’re taking a working piece of history which was used to photograph ground targets from over two miles in the air and using it to photograph two-inch wide objects 30″ away from the front element.

We will be using Kodak Portra 160 8×10 sheet film for this project.

The original camera can be seen here

Other photos of the camera can be found on Wikipedia and here is the only image that I could find taken with this camera during wartime.

With this lesson, you’re going to learn:
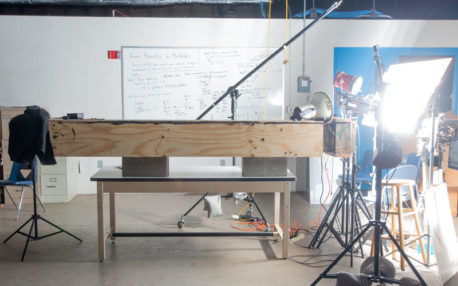
 

Large Format macro

The lens used is a 610mm or 24″ Bausch and Lomb and came out of a Fairchild K-22 camera. Originally used for reconnaissance, we’re going to use it to photograph tiny stuff.

  • How to calculate a reproduction ratio.
  • How to calculate a bellows draw
  • How to compensate for light loss
  • Where to focus
  • How to calculate exposure when your meter can’t read high enough.
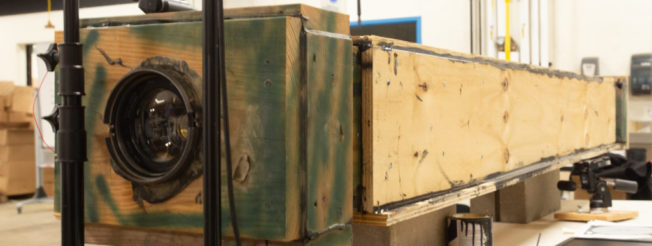
610mm Bausch and Lomb


Choosing a Lens

Originally, I wanted to photograph hummingbirds in flight with a smaller version of this camera. Therefore, I needed a long lens to give me adequate space between the front element and where the hummingbird would be feeding. So, I opted for a 610mm Bausch and Lomb Aero Tessar. These lenses can be had for cheap, like $70 on eBay. 

The longer your lens, the farther you can have your object from the camera lens and still be in focus. If you use a short lens, you will need to have the item closer to the lens (the equations to figure distance are below). Also, the longer your lens, the longer your camera will have to be to achieve your desired magnification ratio, so keep that in mind.

Reproduction Ratios

I know that this camera is beautiful. It’s as much of a work of art as the images that it produces are. To build a camera of this craftsmanship, you obviously need to spend some time planning.

Like I said before, I wanted to use this thing to photograph hummingbirds in macro in flight. A hummingbird is roughly 3.5×4.5. That would fit on an 8×10 inch negative at 1:1 reproduction but it would also leave a lot empty space around the bird. At $27 per shot, you want to maximize that negative’s use so I needed to discover how large I could make the bird on my negative. This is called a reproduction ratio.

To find the reproduction ratio, I divided the size of the film, by the size of the bird so that the bird would fill the frame completely.

8″/3.5″ = 2.3

The bird needs to have space around the edge of the frame to account for movement so I settled on a 2:1 reproduction ratio. Every inch of bird would equal two inches on my film.

For this class, I decided to make the reproduction ratio 4:1 because bigger is always better. The math is the same but now every inch of subject equals four inches of film!
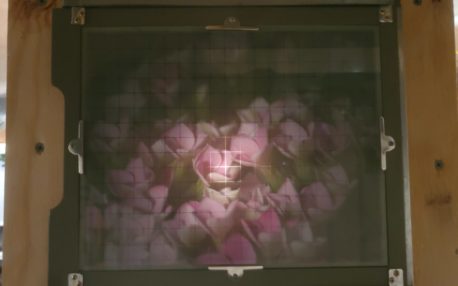
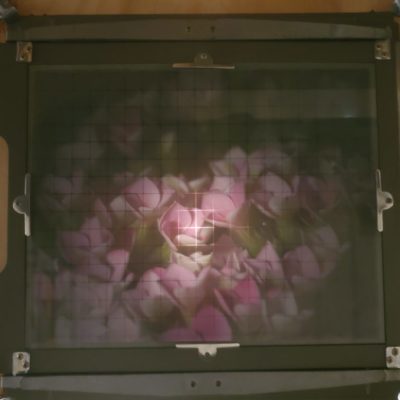
macro 8x10

Bellows Draw

Technically, this is an extension tube because it’s solid. The math doesn’t change though. Bellows and extension tubes just put distance between the lens and the focal plane. This distance allows you to focus closer to your object. The further you push your focal plane back, the closer you can get to your object, thus increasing the magnification and the reproduction ratio.

This lens is a 610mm lens. That means that the distance from the convergence point inside the lens to the focal plane should be 610mm when focused at infinity. That is its focal length.

To figure out how long your bellows need to be, multiply your focal length by your reproduction ratio.

610mm x 4 = 2440mm of bellows extension (or a 2440mm extension tube).

Now, add you original focal length to that number and you will get the total length of your camera (this calculation is only useful if you have to build your camera or use a second set of bellows)

2440mm of extension + 610mm = 3050mm of total camera
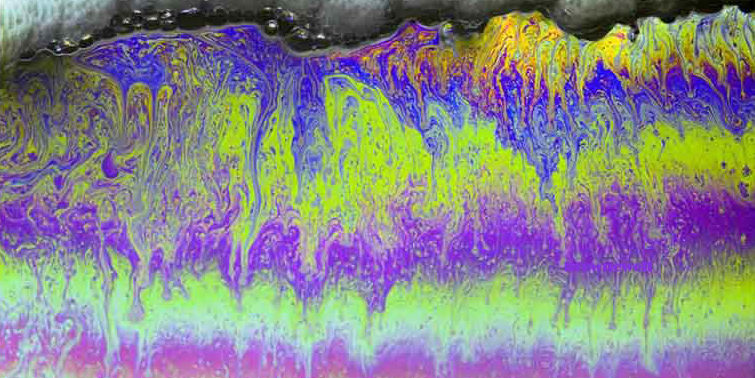
8x10 macro


Exposure Compensation

Just like when using flashes in the studio, light density falls off as you move the light further from your subject. In this instance, we aren’t moving the light, we’re moving the focal plane. The light loss still follows the Inverse Square Law. If you double the distance, you lose two stops of light.

To find the specific loss of light intensity, in stops, follow the following formula:

((Bellows extension/Focal length)^2)log 2 = stops of compensation (remember, bellows extension is just reproduction ratio x focal length so ours is 2440mm)

((2440mm/610mm)^2)log2

((4)^2)log2

16 x log2

4.8 stops of light loss that you need to compensate for.

Now, that was the hard way to do it. And that’s the way you should do it if you’re shooting transparencies. We aren’t shooting transparencies so we have a bit more latitude. In other words, we can estimate. The estimation formula is:

Reproduction ratio +1 = stops of compensation

So for us:

4+1 = 5 stops of compensation.


Focusing Distance

Now, when you start using this thing you’re going to say, “Mr. B., it’s so dark, I don’t know when it’s focused!” Don’t worry, there’s a formula for that! 

1/focal length = 1/bellows extension + 1/focusing distance


Let’s get focusing distance on its own with some simple algebra:

1/focal length – 1/bellows extension = 1/focusing distance

1/610mm – 1/2440mm = 1/focusing distance

0.0016393 – 0.0004098 = 1/focusing distance

0.0011896 = 1/focusing distance

Focusing distance = 1/0.0011896

Focusing distance = 813mm from the center of the optical system (roughly the aperture)


Now that you have your exposure compensation and focusing distance, consult the internet for a reproduction depth of field scale. The math is hard and it will be the same for every lens. I used this one, it’s midway down the page.

Find your desired depth of field for your reproduction ratio, add in your exposure compensation, and you’ll be all set to get to work dialing in your exposure!
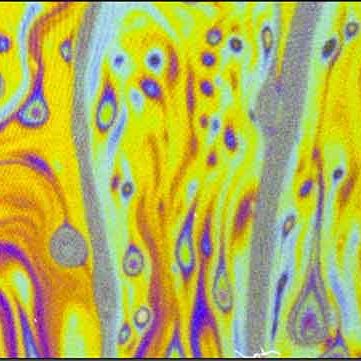
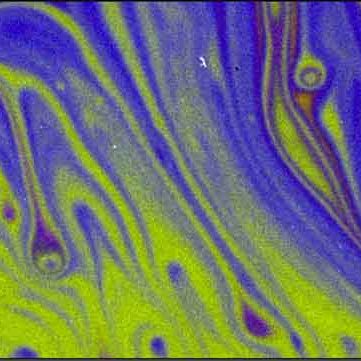
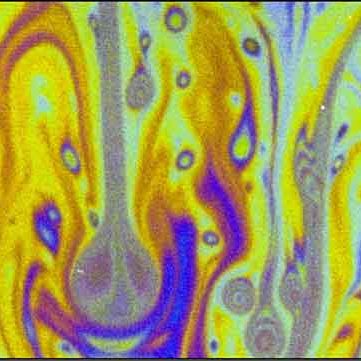
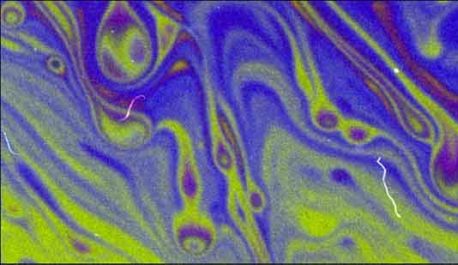
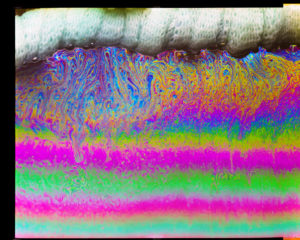
bubble photo

macro bubble

bubble photo

bubble photography

Photography

We’re finally ready to take some photos with this thing, right? Of course not, there’s still more math to go!

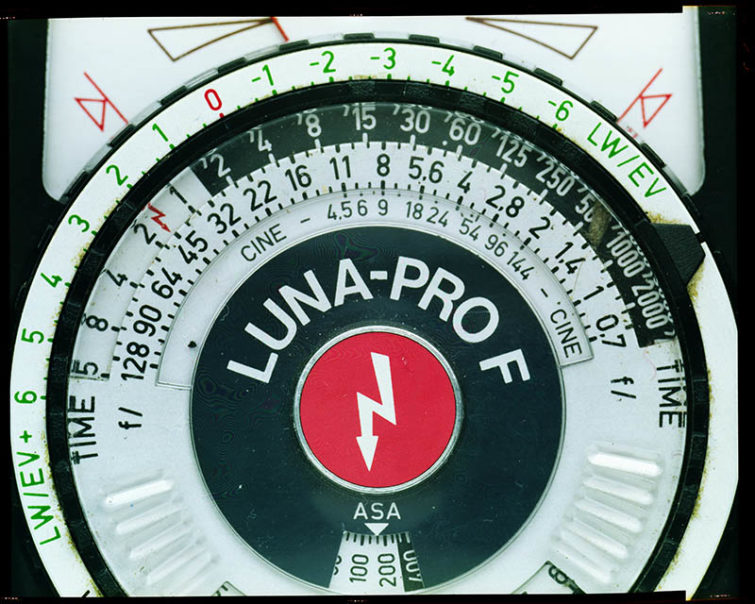
We’re shooting with a nominal aperture of f/32. With the five stops of compensation added in, we need to be aiming for f/181 or f/125 + 1 stop. I can look at my light meter and see that we’re already in trouble. It only goes to f/125 and it’s a bit flakey up that high to boot. Thankfully, we’re using Photogenic Powerlight 2500s with the digital readout. That digital readout is important because it reads in watt/seconds. So, if we can find a setting that works at f/32 on my meter then we can double the light five times to get the proper exposure.

For me, that happened to be 62 w/s for f/32. Use the chart to the right and get shooting!

Power levels and effective aperture chart

  • 62 w/s = f/32
  • 125 w/s = f/45
  • 250 w/s = f/65
  • 500 w/s = f/90
  • 1000 w/s = f/125
  • 2000 w/s = f/181

At f/32 and a 4:1 reproduction ration, the depth of field is only 1mm. It takes a minimum of 1000 watts of constant light placed four feet away from the subject in order to be able to focus the camera.

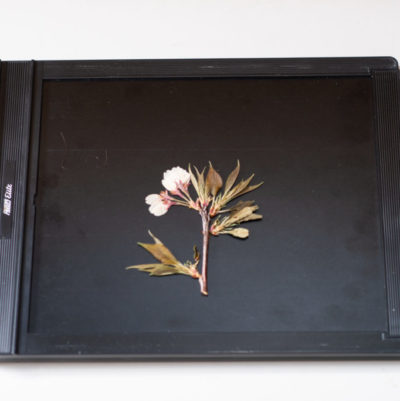
8x10 macro

Formulas

Reproduction Factor

This is how large you want your object to be in your frame. Personally, I measure the thing first and then divide it by frame size. You could also have a specific reproduction ratio chosen for your medium ahead of time. It can be a whole number or some decimal. 4:1 means 4x magnification

I wanted 2 inches of object to equal 8 inches on film (4x magnification). So, the equation is:

8 inches of film / 2 inches of object = 4 or 4:1


4 inches on film equals 1 inch on the object  

Bellows Extension


This is the distance from the original focal plane to the new focal plane.

Focal Length x Reproduction Factor = Bellows extension

Exposure Compensation


The light loss still follows the Inverse Square Law. If you double the distance, you lose two stops of light. The formula to determine how much you have to compensate is:

((Bellows extension/Focal length)^2)log 2 = stops of compensation

To estimate:

Reproduction factor + 1 stop = stops of compensation

Focusing Distance


You’re going to want to know an approximate distance to set your subject so that you can start focusing. Use one of these formulas (they’re the same, one is just solved for distance already)

1/focal length = 1/bellows extension + 1/focusing distance

or

Focusing Distance = 1 / (1/Focal Length – 1/Bellows Extension)

Pat Brownewell

Elkhart Area Career Center, Photography Instructor

 

Sunny-16 RUle

The Sunny-16 rule has roots going clear back to at least the 1920s if not earlier. Today, many people find the rule to be outdated. After all, nearly all cameras built from the 1960s forward had some sort of light meter built in. Standalone handheld meters also exists and there are even light meter apps that you can get for your phone.

So why are we taking the time to learn it?

Because it just works. This is handy because we have students with many different types of cameras and meter modes With the Sunny-16 rule, kids can get out and start getting properly exposed photos in minutes, rather than needing individualized lessons on their meters.

When learning about equivalent exposures and manual camera operation the Sunny-16 rule is very simple to learn and get approximately the correct exposure to start.

The rule starts simple. Your shutter speed should be 1/ISO. From there, you can go outside and just look at the weather conditions or shadows to set your aperture. Use the following table:

f/22 – snow or sand

f/16 – bright sun

f/11 – slight overcast

f/8 – overcast

f5/6 – dark overcast (no shadows on the ground)

f/4 – open shade/dusk

If you’re back-lighting, just add one stop.


Example: If I am shooting at 200 ISO on a cloudless afternoon in the middle of a grassy field, your settings would be 200 ISO, 1/200th shutter speed, and f/16.


example

I want to take a photo, on the beach, at sunset, with my subject backlit. I have my ISO set to 400.

ISO = 400

Shutter speed = 1/ISO or 1/400

Aperture = f/2.8 (adding a stop for the backlighting)

From here, I can change my ISO, aperture, or shutter speed to match my creative needs

Moony-11

Many people are curious how to take good photos of the moon. Modern cameras frequently have trouble with the moon because of how bright it can be against such a dark background.

Moony-11 is the solution to that!

Like with Sunny-16, Moony 11 is when your shutter speed is 1/ISO, then:

f/11 – full moon

f/8 – half moon

f/5.6 – quarter moon

f/4 – eighth moon

Exposure Triangle

Aperture, shutter speed, and ISO all work together to create a properly exposed image.

The exposure triangle is a relatively new term first bursting onto the scene somewhere between 2005 and 2010. Before that, it was “time + intensity = exposure.” With digital cameras and their ability to change ISO values, that old mentality went out the window.

The exposure triangle, in my opinion, is meant to teach the concept of equivalent exposures. Assuming that you already have a properly exposed image, when you adjust one setting, you need to adjust something else in an equal, but opposite way.


What makes up the exposure triangle?


Aperture

Aperture is just a hole that lets light hit some sort of recording medium (film, plate, sensor, etc.). They can be mechanical, like those found in modern lenses or leaf shutters. Or, they can be a simple hole, like those found in pinhole cameras. 

Apertures limit the amount of light which can reach a sensor by increasing or decreasing the size of the hole. Changing the size of the hole will also change the depth of field. (visit the Aperture page for a more in-depth understanding of aperture)

Shutter Speed

A shutter controls the amount of time that light is entering the camera. Like an aperture, a shutter can be extremely simple, like using your hand to cover the lens or a pinhole. Or, they can be very complex like leaf shutters.

All shutters limit the amount of light entering the camera by blocking and unblocking the light entering the camera. Shutter speed also dictates the amount of motion blur present in the final image. (visit the Shutter Speed page for a more in-depth understanding of shutter speed)

ISO

In broad terms, ISO is the sensitivity of the recording medium. The higher the number, the more sensitive the medium.

Unlike film, digital ISO can be changed with each photo. However, like film, the high you set your ISO, the worse the image quality will be. As you go up the ISO scale you will notice grain or noise, especially in the shadows.

Generally speaking, you should use the lowest ISO possible which produces the desired aperture and shutter speed settings. (visit the ISO page for a more in-depth understanding)

Why is it important?

The exposure triangle tells you nothing about what the proper exposure for a photo should be. So what makes it important?

The exposure triangle is all about equivalency. Equivalent exposures are when your photos from the same scene have the same brightness (or density if you’re using film). It is when you change one leg of the triangle, like decrease the aperture, and make up for the loss of light by increasing the ISO or decreasing your shutter speed.

Equivalent exposures become important as you look to control your depth of field through changes in the aperture, motion blur through changes in the shutter speed, or control noise with changes in ISO. Knowing that you have to make an adjustment in the other direction (more or less light/sensitivity) becomes very important to your creative process.

ISO

ISO


ISO is the final part of the exposure triangle. It controls the sensitivity (or gain) of your recording medium.

The important thing to remember with ISO is that the lower the number, the less grain or noise your image will have. Your film or sensor will also be less sensitive so you will either need to increase your aperture size or decrease your shutter speed to maintain the same equivalent exposures.

ISO is rated in whole numbers. Like shutter speed, if you double the ISO value (say, from 200 to 400), you have increased the sensitivity by one whole stop because you doubled the sensitivity. If you halve the ISO number, you have decreased the sensitivity by one whole stop.

I grew up shooting film so I personally believe that you should set your ISO according to where you are shooting first and adjust your shutter speed and apertures later. I know of other photographers who adjust it as they need (or use auto-ISO modes which fix your aperture and shutter speed to specific values and change the ISO as needed).

Generally speaking, the more light that a scene has available, the lower your ISO should be. 200 ISO is a great starting place for photos taken in daylight while 800 ISO is a good place to start for indoor photos. Adjust as needed to get the results that you want.

Grain/Noise

In order to increase the sensitivity of the film stock, larger grains of silver are used. This lessens the amount of detail present and leads to noticeable grain in the finished print.

ISO in digital cameras is handled a bit different. All camera sensors have a base ISO (also called native ISO). From there more voltage is applied to the sensor to reach higher ISO ratings. As this happens, digital noise is introduced to the final image which degrades it the more you increase the ISO.

Just like with film, as you increase the sensitivity of your sensor, you lose dynamic range (the range of values and colors present in an image). This is why photos taken at night often look washed out or have a yellow/orange/brown tinge to them, especially in the shadows.

Marian McBride

Developer

Sally Bishop

Creative Director

Lelia Meyer

Designer

Shutter Speed

Shutter speed, along with aperture and ISO, is part of the exposure triangle. Shutter speeds are almost always written in seconds or fractions of a second.

There are a few main types of shutters, which are covered in the shutter section. They all function slightly differently but their main goal is to control the length of time light is falling on the sensor, film, or recording medium.

Just like learning to control the aperture is part of the photographic process, learning how shutter speed impacts your photos is equally important.

Heading

Description

Description

Description


Shutter Speeds Help Control Motion

Shutter speeds control how much motion blur is present in a photo. Motion blur comes in two different varieties. Camera shake is accidental motion blur caused by the person holding the camera at a slow speed. Intentional blur is when you decide to use settings that either impart blur into the photo or freeze motion; it’s purposeful.

Camera Shake


Camera shake is a fairly easy problem to solve. In order to remove camera shake, increase the shutter speed and compensate by changing your ISO or aperture. A good rule of thumb is to follow the 1/focal length rule. That means that, usually, as long as you are shooting faster than whatever your focal length is, your photo will be acceptably blur free. As an example, if I am using a 200mm lens, I would try to avoid shooting under 1/200th of a second while hand holding.

Newer lenses and bodies may have stabilization aids built into them. From what I have seen, they always measure the effectiveness of the stabilization in terms of stops. That means that you can shoot hand-held at however many stops the images stabilization is rated for. For example, a 300mm lens with two stops of stabilization should be able to be hand-held down to 1/80th of a second. (In practice, I have not found this to be true on larger lenses which are excessively heavy.)

Some manufacturers claim that using a lens with image stabilization on a body with sensor stabilization allows you to stack the stabilization. So, a Nikon lens with two stops of stabilization mounted on a camera with three stops of stabilization abilities could theoretically give you five stops of stabilization. That would mean that same 300mm lens with two stops of stabilization would be able to be hand held at 1/10th of a second! (Again, I doubt the effectiveness in longer or heavier lenses)

Another way to avoid camera shake is to use a monopod or tripod when shooting at slow speeds. Tripods are usually more stable than monopods. Quality tripods are usually rated in weight. Generally, buying a tripod that can support twice the weight of your camera will provide you with the sturdiness that you need in the max taxing situations.


Intentional Blur

Learning to control blur will give you another tool to create impactful images throughout your photographic career. “Controlling” in this sense does not mean to freeze all the action all the time but rather learning techniques to freeze motion or blur objects and people. Knowing when to use a method is dependent on the look that you are trying to achieve.

We will be covering three major areas of motion blur in class. The first is long-exposure blur where the shutter is open excessively long, allowing an object’s motion to be appear as blurry. The second is frozen motion where an object appears frozen in time. The third is zoom blur which will give an object the appearance of exploding into view.

Long Exposure

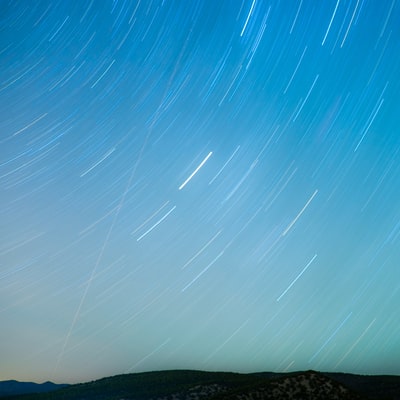
Long exposures happen when the shutter is open long enough to capture some sort of motion caused blur. It could be a multiple minute long exposure meant to catch clouds streaking across the sky. Most firework photos are taken with five to 30 seconds of exposure. Or, maybe you’re trying to show the motion of dirt flying off a rally car and “slow” your shutter speed down to 1/250th.

Long shutter speeds can also be used to pan along with the subject. Doing this will blur the background of the image while isolating the movement of the subject.

Frozen Motion

Frozen motion is caused by having a sufficiently fast enough shutter speed to prevent blur from being recorded.

In all instances involving a mechanical shutter, the faster the object is moving, the faster your shutter speed will need to be in order to create photos which have no blur. In other words, it will take a faster shutter speed to stop the motion of a hummingbird’s wings than a manatee swimming.

Also, in general, the farther away an object is, the slower the shutter speed can be in order to stop the motion (this assumes that all other things are being held constant). This is due to the angular distance needed to travel in order to produce visible motion blue. So, pretend that I am photographing two identical planes at the same time, one of which is a mile away, the other of which is two miles away. The plane closest to me will travel a longer angular distance than the farther plane so I would need a faster shutter speed to stop its motion than I would for the farther plane. (see illustration)

Zoom Blur

Zoom blur occurs when you change the focal length of the lens (zoom in or out) while the shutter is open. Your shutter speed must be slow enough to allow you time to operate the zoom ring in order to utilize this technique.

Focus racking is a slightly different technique than zoom blur but the concept is the same. Your shutter speed just has to be slow enough to rotate the focus ring. This technique is frequently used during firework shows or at night while photographing bright cityscapes.


A bit about photography


The word “photography” comes from the Greek word, “photo,” meaning “light,” and “graphium” which means “stylus” (for writing/drawing). Put simply, photography is just drawing with light.

Photography, as a process is incredibly simplistic and easy to become proficient in. Unlike drawing, which requires some physical dexterity; dance, which requires rhythm; or sculpting, which requires some amount of physical strength; photography can be as simple as figuring out how to press a button. Most digital cameras today are so good, that they will do the majority of the work for you. Even mastering manual mode in available light conditions just requires a very basic understanding of the process.

However, like any art, mastering photography requires dedication. You are unlikely to learn to take impactful or commercially successful photos unless you are unwilling to objectively look at your work and try to make it better. It won’t happen overnight, and that’s ok.

One thing that I want to stress early on is that you can’t buy your way into a successful photography career. You can spend tens of thousands of dollars and still take boring photos. Trust me, I do it all the time.

In this course, we’re going to go about learning photography a bit different than most courses. Where most courses start with types of cameras, lenses, and other gear; we’re going to skip that initially and revisit it after composition. I want you to be able to properly expose a photo first and learn to compose a photo second. Then, we’ll start to move on to gear, history, and technique discussions.

The best camera is the one that’s with you. – C.Jarvis

Throughout this course you will hear me continually say “don’t buy anything unless you can describe why your current gear won’t do.”

Camera companies have done an amazing job convincing the majority of the world that their current gear isn’t good enough. Internet forums are buzzing with why your camera is bad and why you should upgrade.

The truth is, you only need to upgrade or add to your equipment when your current equipment isn’t doing what you need it to do.

What is a “photographer”

Hundreds of debates per day happen across the internet regarding what makes a person a “photographer.”

A photographer is just someone who enjoys taking photos. It says nothing about gear, skill level,etc.
A professional photographer is someone who is paid for their images. Again, the gear they use or their skill level is irrelevant.

Aperture is:

Put simply, a hole that allows light to reach the recording medium. It can get larger or smaller in nearly all lenses.


Aperture controls:

First and foremost, the aperture’s main function is to control the amount of light entering the camera by increasing or decreasing the size of the hole.

Depth of Field:

Aperture is one way to control depth of field. The larger the aperture, the more shallow the depth of field will be. The smaller the aperture, the deeper the depth.

Camera Obscura

The Camera Obscura is simply a light tight box with a hole opposite of the recording medium. Occasionally, they may have a lens.

Aperture basics

In week one, we turned the entire room into a Camera Obscura, a primitive camera. The windows and doors were blackened with paper and a large hole was cut into the paper covering the window. 

This large hole was our aperture.

We used an old screen printing silk to project the image onto so that students could see how the image changed. Using pieces of paper with smaller and smaller holes, students could watch the resulting projected image become sharper yet more dark each time the hole diameter was decreased.

See the photos below for reference:

F-Stops

F-stops is the function of the lens’ focal length divided by the physical diameter of the aperture. For instance, a 500mm lens with a 50mm aperture diameter will be at f/10. A 200mm lens with a 50mm aperture diameter will be at f/4.

F-stops do not change between lenses. What I mean by that is if you have a 28mm lens at f/10 and a shutter speed of 1/60 and you change to a 300mm lens, your settings will not need to be changed (f/10, 1/60th). {note, this may not be exactly accurate because of light transmission properties or T-stops}.

F-Stop

Focal length/aperture diameter = f-stop number and are interchangeable between lenses

Depth of Field

Depth of Field (DoF) refers to how much of an image is in focus from near to far.

Depth of Field as it Relates to Apertures

A large aperture diameter (or lower f-stop number) will let in more light but the image will have a very narrow depth of field. Conversely, a small aperture diameter will create a deeper depth of field but will allow less light to reach the recording media.

For instance, if you are shooting a group of eight people, you will need a deeper depth of field to get them all in focus (a good rule of thumb for group numbers is f-stop = the number of people in the photo). If you are photographing a single person and want to isolate them from the background, a wide aperture will blur the background (bokeh) but keep the person in focus.